
A production ready web mapping toolkit - Part 1
The long term goal of this series of posts is to develop a set of ready to use tools that will enable the rapid setup of web mapping servers that can be prototyped, developed, and moved to production without a lot of embarrassing oversights. The key technologies that I want to use are:
- PostgreSQL/PostGIS
- Django/Python/GeoDjango
- Docker
- Leaflet and Openlayers
- TLS/HTTPS using LetsEncrypt!
This first post will deal with getting the basic server set up. By the end of this post, you should have a cloud based server, running Docker, with separate containers running PostgreSQL, Django, Nginx, and Certbot. Later posts will deal with installing PostGIS, writing Django apps to handle back end tasks and hooking up javascript mapping libraries to our web pages.
Get Yourself A Droplet From The Digital Ocean
I’m going to assume that all the work will be done in the cloud. If you already have a cloud service you are using, then you may have to adapt some of the commands to work with your service. If you don’t have a cloud service account, may I suggest DigitalOcean? The service is easy to use and low cost and, best of all, if you sign up through my referral link you will receive a $10 credit to get started. Since this tutorial will run on the lowest cost server on DO, that will cover you for two months of free experimentation.
So, you have your Digital Ocean account? Great, now;
- click on the Create Droplet link
- click the One-click Apps tab
- select Docker 1.12.3 on 16.04 (note these version numbers will change in the future)
- select the $5 size option - this gives you one CPU with 512MB of RAM and a 20GB SSD
- select the datacenter region nearest to you
- (optional) upload an SSH key for secure login
- choose a host name, such as django-base
- click the create button
NOTE: If you want to use SSH keys as mentioned in step 6, here is a useful tutorial on how to do that. If you skip this step, DO will email you a password that will allow you to log in as root.
Configure The server
You will need an SSH client to do this, I use PuTTY and it works pretty well. If you are using an SSH key, you should follow the tutorial linked above, otherwise log in using the password that DO will have emailed you. Either way, you will need to know the IP address of the droplet, which can be copied off the DO web page.
Create A User Account
Once you are logged in as root, create a non-root user, add them to the docker and sudo groups, then switch user (su) to that account:
root@django-base:~# useradd -m -d /home/dave -s /bin/bash -U dave
root@django-base:~# passwd dave
root@django-base:~# usermod -a -G docker dave
root@django-base:~# usermod -a -G sudo dave
root@django-base:~# su -l dave
dave@django-base:~$
If you are not familiar with some of these linux commands, here is a useful cheat sheet to get you started.
Install Some Useful Tools
We’re going to need some python tools for this work, so lets install pip, virtualenv, cookiecutter, and docker-compose.
dave@django-base:~$ sudo apt-get update
dave@django-base:~$ sudo apt-get install python-pip
dave@django-base:~$ sudo apt-get install virtualenv
dave@django-base:~$ pip install "cookiecutter>=1.4.0"
dave@django-base:~$ pip install docker-compose
Use an Existing Template
A common pattern for configuring web services is to have a set of docker containers, each of which serves a specific purpose. In our case, we want:
- a database container to store data and serve requests,
- a django container to provide CRUD services and content management,
- an nginx container to provide a web server,
- a certbot container to manage security certificates
To achieve this quickly, we will leverage the good work of some very smart people.
Create A New Directory And Use Cookiecutter-Django
The next bit uses some awesome templating work that is provided by Daniel Greenfield (pydanny), one of the co-authors of the book Two Scoops of Django, which I highly recommend. We will create a new directory called cc_demo, cd into that directory, then run the cookiecutter script using the cookiecutter-django recipe on github. The script will ask a bunch of questions, which we will mostly accept the defaults for, see the following for my changes:
dave@django-base:~$ mkdir cc_demo
dave@django-base:~$ cd cc_demo/
dave@django-base:~/cc_demo$ ls
dave@django-base:~/cc_demo$ cookiecutter https://github.com/pydanny/cookiecutter-django
Cloning into 'cookiecutter-django'...
remote: Counting objects: 8324, done.
remote: Compressing objects: 100% (50/50), done.
remote: Total 8324 (delta 27), reused 0 (delta 0), pack-reused 8274
Receiving objects: 100% (8324/8324), 2.91 MiB | 0 bytes/s, done.
Resolving deltas: 100% (5373/5373), done.
Checking connectivity... done.
project_name [Project Name]: Cookie Cutter Demo
project_slug [cookie_cutter_demo]:
author_name [Daniel Roy Greenfeld]: David Currie
email [you@example.com]: dcurrie@geoanalytic.com
description [A short description of the project.]: A demo website
domain_name [example.com]: positionbot.com
version [0.1.0]:
timezone [UTC]: America/Edmonton
use_whitenoise [y]:
use_celery [n]:
use_mailhog [n]:
use_sentry_for_error_reporting [y]:
use_opbeat [n]:
use_pycharm [n]:
windows [n]:
use_python3 [y]:
use_docker [y]:
use_heroku [n]:
use_elasticbeanstalk_experimental [n]:
use_compressor [n]:
Select postgresql_version:
1 - 9.5
2 - 9.4
3 - 9.3
4 - 9.2
Choose from 1, 2, 3, 4 [1]:
Select js_task_runner:
1 - Gulp
2 - Grunt
3 - None
Choose from 1, 2, 3 [1]:
use_lets_encrypt [n]: y
Select open_source_license:
1 - MIT
2 - BSD
3 - GPLv3
4 - Apache Software License 2.0
5 - Not open source
Choose from 1, 2, 3, 4, 5 [1]:
You selected to use docker and a JS task runner. This is NOT supported out of the box for now. You can continue to use the project like you normally would, but you will need to add a js task runner service to your docker configuration manually.
You selected to use Let's Encrypt, please see the documentation for instructions on how to use this in production. You must generate a dhparams.pem file before running docker-compose in a production environment.
dave@django-base:~/cc_demo$
Note that if you don’t have a domain name under your control, that question can be skipped but several components won’t work, including TLS encryption and mail service with MailGun.
Once the script is finished, you should have a new directory created within the cc_demo directory which contains all the goodness of the cookiecutter-django recipe. Here is the tree view of the directory that I get:
cookie_cutter_demo/
├── compose
│   ├── django
│   │   ├── Dockerfile
│   │   ├── Dockerfile-dev
│   │   ├── entrypoint.sh
│   │   ├── gunicorn.sh
│   │   └── start-dev.sh
│   ├── nginx
│   │   ├── dhparams.example.pem
│   │   ├── Dockerfile
│   │   ├── nginx.conf
│   │   ├── nginx-secure.conf
│   │   └── start.sh
│   └── postgres
│       ├── backup.sh
│       ├── Dockerfile
│       ├── list-backups.sh
│       └── restore.sh
├── config
│   ├── __init__.py
│   ├── settings
│   │   ├── common.py
│   │   ├── __init__.py
│   │   ├── local.py
│   │   ├── production.py
│   │   └── test.py
│   ├── urls.py
│   └── wsgi.py
├── CONTRIBUTORS.txt
├── cookie_cutter_demo
│   ├── contrib
│   │   ├── __init__.py
│   │   └── sites
│   │       ├── __init__.py
│   │       └── migrations
│   │           ├── 0001_initial.py
│   │           ├── 0002_alter_domain_unique.py
│   │           ├── 0003_set_site_domain_and_name.py
│   │           └── __init__.py
│   ├── __init__.py
│   ├── static
│   │   ├── css
│   │   │   └── project.css
│   │   ├── fonts
│   │   ├── images
│   │   │   └── favicon.ico
│   │   ├── js
│   │   │   └── project.js
│   │   └── sass
│   │       └── project.scss
│   ├── templates
│   │   ├── 403_csrf.html
│   │   ├── 404.html
│   │   ├── 500.html
│   │   ├── account
│   │   │   ├── account_inactive.html
│   │   │   ├── base.html
│   │   │   ├── email_confirm.html
│   │   │   ├── email.html
│   │   │   ├── login.html
│   │   │   ├── logout.html
│   │   │   ├── password_change.html
│   │   │   ├── password_reset_done.html
│   │   │   ├── password_reset_from_key_done.html
│   │   │   ├── password_reset_from_key.html
│   │   │   ├── password_reset.html
│   │   │   ├── password_set.html
│   │   │   ├── signup_closed.html
│   │   │   ├── signup.html
│   │   │   ├── verification_sent.html
│   │   │   └── verified_email_required.html
│   │   ├── base.html
│   │   ├── bootstrap4
│   │   │   ├── field.html
│   │   │   └── layout
│   │   │       └── field_errors_block.html
│   │   ├── pages
│   │   │   ├── about.html
│   │   │   └── home.html
│   │   └── users
│   │       ├── user_detail.html
│   │       ├── user_form.html
│   │       └── user_list.html
│   └── users
│       ├── adapters.py
│       ├── admin.py
│       ├── apps.py
│       ├── __init__.py
│       ├── migrations
│       │   ├── 0001_initial.py
│       │   └── __init__.py
│       ├── models.py
│       ├── tests
│       │   ├── factories.py
│       │   ├── __init__.py
│       │   ├── test_admin.py
│       │   ├── test_models.py
│       │   ├── test_urls.py
│       │   └── test_views.py
│       ├── urls.py
│       └── views.py
├── dev.yml
├── docker-compose.yml
├── docs
│   ├── conf.py
│   ├── deploy.rst
│   ├── docker_ec2.rst
│   ├── index.rst
│   ├── __init__.py
│   ├── install.rst
│   ├── make.bat
│   └── Makefile
├── env.example
├── gulpfile.js
├── LICENSE
├── manage.py
├── package.json
├── pytest.ini
├── README.rst
├── requirements
│   ├── base.txt
│   ├── local.txt
│   ├── production.txt
│   └── test.txt
├── setup.cfg
└── utility
    ├── install_os_dependencies.sh
    ├── install_python_dependencies.sh
    ├── requirements-jessie.apt
    ├── requirements-trusty.apt
    └── requirements-xenial.apt

28 directories, 103 files
Most of this stuff is specific to django and its supporting tools. We’ll get into those later. The docker specific bits are found in the compose and requirements directories plus the two .yml files in the root directory.
Time To Start With The Source Code Control
This is a good time to start saving our work.
$ git init
$ git add .
$ git commit -m “First commit”
Bring Up The Development Server
The default cookiecutter-django installation gives us two docker configurations as .yml files. If we use the dev.yml file, only the database and django containers will be run. The django webserver will be run on port 8000. This is a good way to test a few things but is not recommended for production. Before we can get started, we need to change one file: config/settings/local.py. To do this we need a text editor. You could use nano on the command line:
$ nano config/settings/local.py
or you could use something like WinSCP. In any case, you need to specify the ALLOWED_HOSTS setting to be the IP address of your server. Mine looks like this:
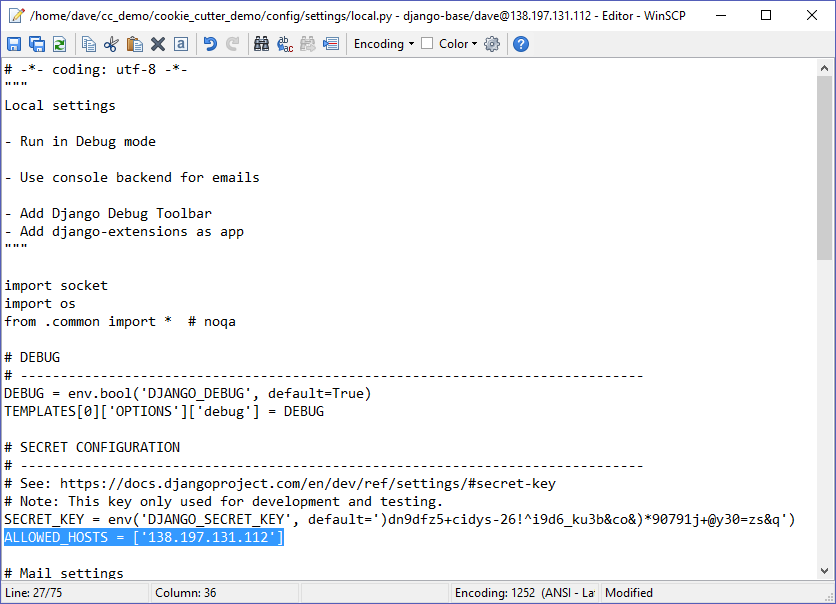
Once that change has been saved, cd to the cookie_cutter_demo directory (where the dev.yml file is located) and use docker-compose to build and run the main containers.
$ docker-compose -f dev.yml build
$ docker-compose -f dev.yml up -d
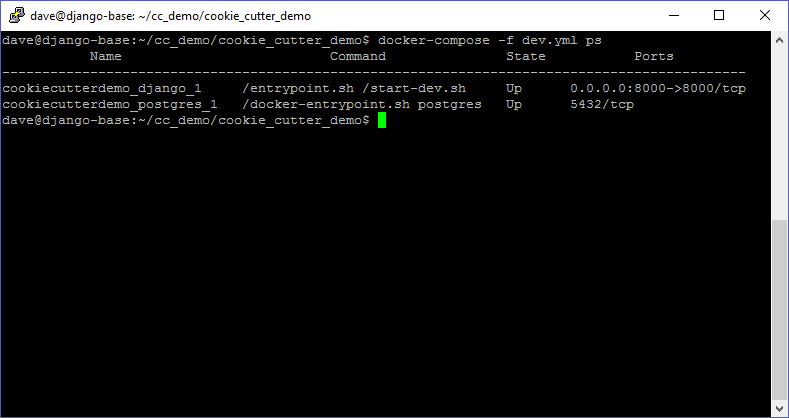
$ docker-compose -f dev.yml ps
The first time we run the build command it will take a while to download and configure everything. The ps command should show us something like this:
Migrations and Superuser
Before we can access the site, we need to migrate the database and create a superuser.
$ docker-compose -f dev.yml run django python manage.py makemigrations
$ docker-compose -f dev.yml run django python manage.py migrate
$ docker-compose -f dev.yml run django python manage.py createsuperuser
The above commands should be explained. Each one invokes the run command on the django container (which is described in the dev.yml file). Within the container, python will be invoked to run the manage.py script with the specified option. These options are covered early in the django tutorial.
Test the Django Code
Now we should be able to run some tests using py.test.
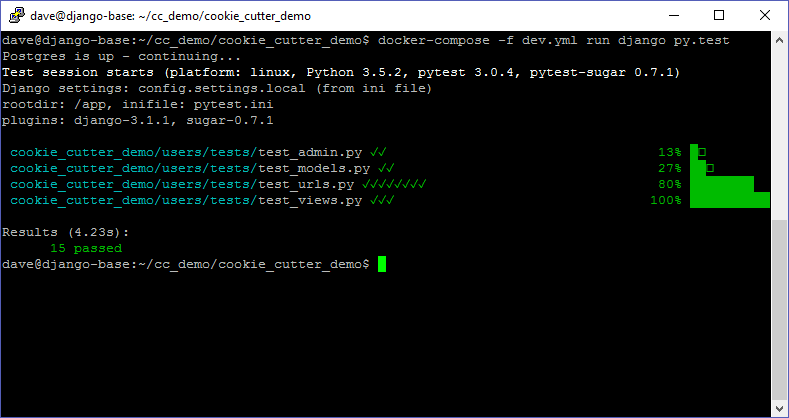
Woot! Note that the basic cookiecutter-django package has 100% test coverage. Nowhere to go but down from here. The server should be running at port 8000 of the our droplet.
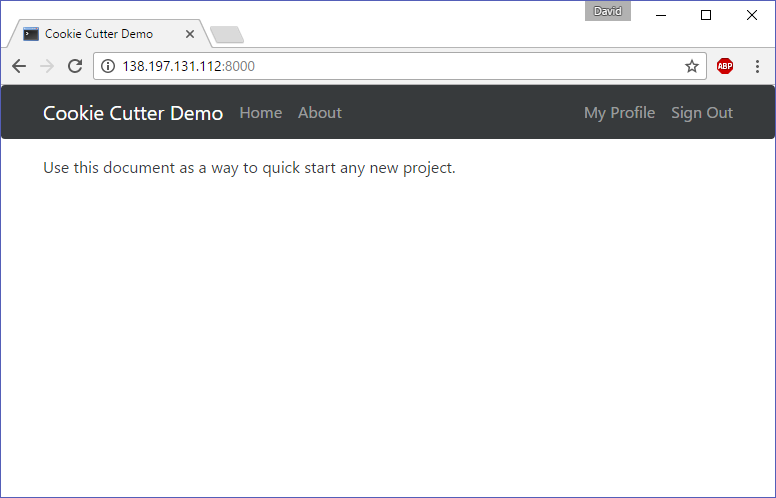
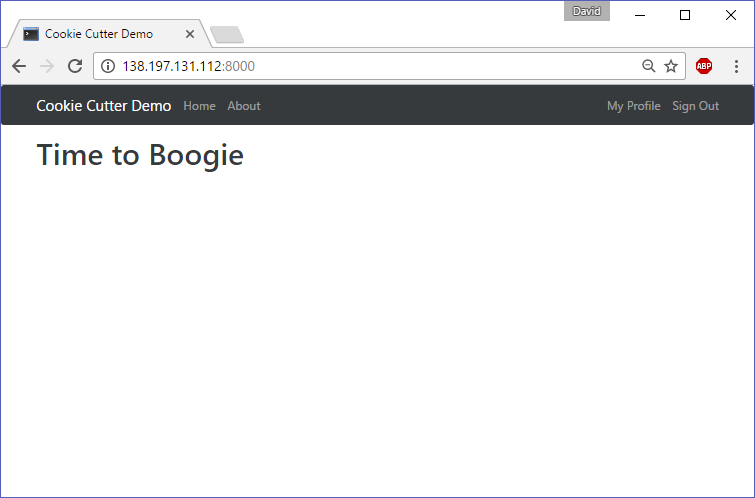
Not much to see there, but since we are using the development server, any changes we make will be updated right away. Let’s edit the file cookie_cutter_demo/templates/pages/home.html
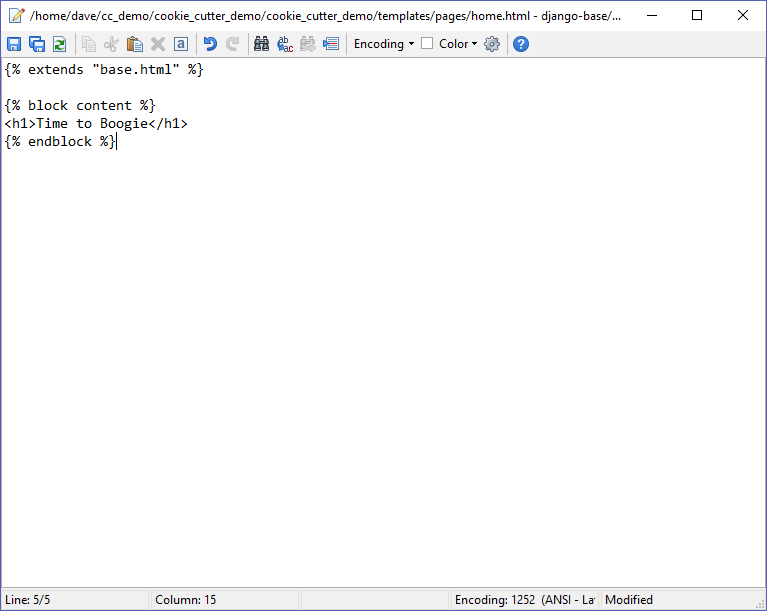
And reload the web page.
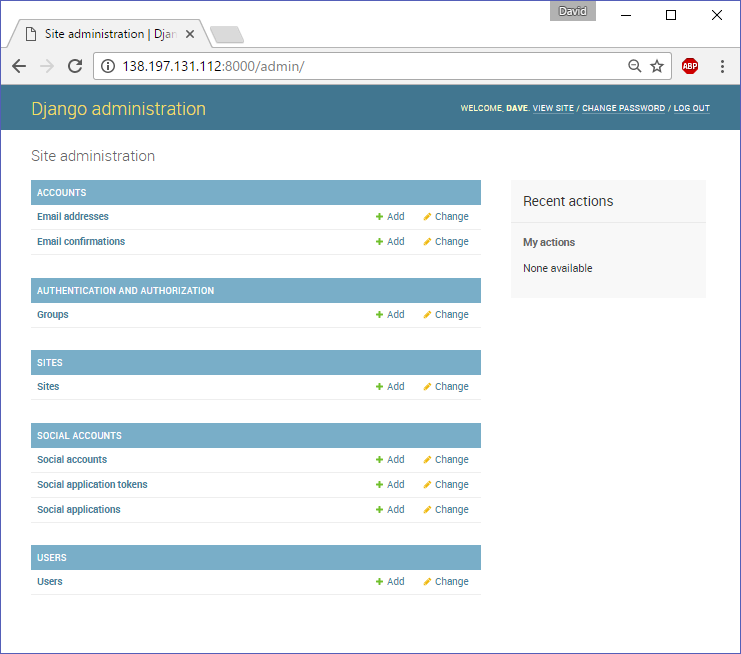
Using the superuser credentials we created earlier, we can access the django administration pages like so:
Clean Up
That should do it for this post. The next steps will be:
- swap out the PostgreSQL container for one with PostGIS
- configure and run the production server, which uses an Nginx container and serves secure web pages with LetsEncrypt!
- Then we can get into the meat of developing some django applications
Before we finish, we will stop and remove the docker containers.
$ docker-compose -f dev.yml down