
A production ready web mapping toolkit - Part 2
This is the second in a series of posts aimed at developing a set of containers that can be quickly deployed to enable web mapping in a production environment. At the conclusion of the first post, we had an empty PostgreSQL database container serving a django container running the development server on port 8000. The next steps are to get PostGIS for a database and enable spatial queries using GeoDjango.
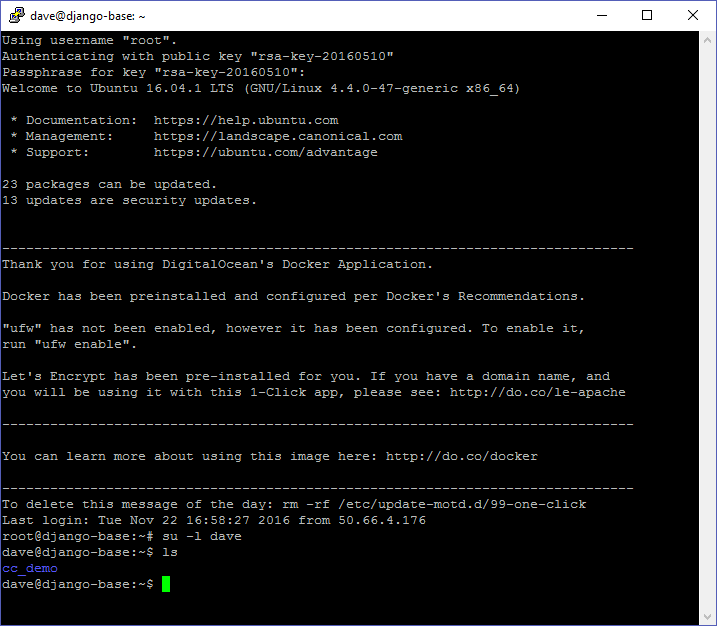
We begin by logging in to our DO server using PuTTY and switching to our non-root user account.
Going Spatial
Since we are doing mapping, we need spatial query capabilities, so bog standard PostgreSQL won’t be sufficient, we need PostGIS. One way to get this would be to insert the installation instructions for PostGIS into the Postgres dockerfile, but since we are shamelessly using the hard work of others anyway let’s just grab a dockerfile that does it all for us. I like this one but there are others that will probably work well too.
Get A PostGIS Dockerfile
To get it, we will change to the compose directory and clone the repository.
$ git submodule add https://github.com/kartoza/docker-postgis.git compose/docker-postgis
The compose directory should now look like this:
compose
├── django
│   ├── Dockerfile
│   ├── Dockerfile-dev
│   ├── entrypoint.sh
│   ├── gunicorn.sh
│   └── start-dev.sh
├── docker-postgis
│   ├── 71-apt-cacher-ng
│   ├── build.sh
│   ├── commit-and-deploy.sh
│   ├── Dockerfile
│   ├── README.md
│   ├── run-postgis-docker.sh
│   ├── setup.sh
│   └── start-postgis.sh
├── nginx
│   ├── dhparams.example.pem
│   ├── Dockerfile
│   ├── nginx.conf
│   ├── nginx-secure.conf
│   └── start.sh
└── postgres
    ├── backup.sh
    ├── Dockerfile
    ├── list-backups.sh
    └── restore.sh

4 directories, 22 files
Once we are happy with our new database, we can remove the postgres directory as we won’t be using it anymore.
Install GDAL and Proj In the Django Container
While the standard django installation includes the geodjango code, it relies on some other things which are not automatically installed in the django container. We’ll edit the file compose/django/dockerfile-dev so it looks like this:
FROM python:3.5

ENV PYTHONUNBUFFERED 1

RUN apt-get update -y
RUN apt-get -y install binutils libproj-dev gdal-bin

# Requirements have to be pulled and installed here, otherwise caching won't work
COPY ./requirements /requirements
RUN pip install -r /requirements/local.txt

COPY ./compose/django/entrypoint.sh /entrypoint.sh
RUN sed -i 's/\r//' /entrypoint.sh
RUN chmod +x /entrypoint.sh

COPY ./compose/django/start-dev.sh /start-dev.sh
RUN sed -i 's/\r//' /start-dev.sh
RUN chmod +x /start-dev.sh

WORKDIR /app

ENTRYPOINT ["/entrypoint.sh"]
Note the RUN apt-get ... lines are the changes. The same changes will need to be applied to compose/django/dockerfile, which should end up looking like this:
FROM python:3.5

ENV PYTHONUNBUFFERED 1

# Install spatial libraries to work with Postgis and Geodjango
RUN apt-get update -y
RUN apt-get -y install binutils libproj-dev gdal-bin python-gdal

# Requirements have to be pulled and installed here, otherwise caching won't work
COPY ./requirements /requirements

RUN pip install -r /requirements/production.txt \
    && groupadd -r django \
    && useradd -r -g django django

COPY . /app
RUN chown -R django /app

COPY ./compose/django/gunicorn.sh /gunicorn.sh
COPY ./compose/django/entrypoint.sh /entrypoint.sh
RUN sed -i 's/\r//' /entrypoint.sh \
    && sed -i 's/\r//' /gunicorn.sh \
    && chmod +x /entrypoint.sh \
    && chown django /entrypoint.sh \
    && chmod +x /gunicorn.sh \
    && chown django /gunicorn.sh

WORKDIR /app

ENTRYPOINT ["/entrypoint.sh"]
While we are in the django/compose folder, we’ll make one more change to the shell script entrypoint.sh. This is the script that creates the connection string for the database that django uses, and defaults to creating a database with the same name as the users name. Since our new PostGIS installation has a different name (gis), we’ll add an environment variable called POSTGRES_DB that will hold our database name.
#!/bin/bash
set -e
cmd="$@"

# This entrypoint is used to play nicely with the current cookiecutter configuration.
# Since docker-compose relies heavily on environment variables itself for configuration, we'd have to define multiple
# environment variables just to support cookiecutter out of the box. That makes no sense, so this little entrypoint
# does all this for us.
export REDIS_URL=redis://redis:6379

# the official postgres image uses 'postgres' as default user if not set explictly.
if [ -z "$POSTGRES_USER" ]; then
    export POSTGRES_USER=postgres
fi

export DATABASE_URL=postgres://$POSTGRES_USER:$POSTGRES_PASSWORD@postgres:5432/$POSTGRES_DB


function postgres_ready(){
python << END
import sys
import psycopg2
try:
    conn = psycopg2.connect(dbname="$POSTGRES_DB", user="$POSTGRES_USER", password="$POSTGRES_PASSWORD", host="postgres")
except psycopg2.OperationalError:
    sys.exit(-1)
sys.exit(0)
END
}

until postgres_ready; do
  >&2 echo "Postgres is unavailable - sleeping"
  sleep 1
done

>&2 echo "Postgres is up - continuing..."
exec $cmd
If you look carefully, you will see there are two instances where the value $POSTGRES_USER is changed to $POSTGRES_DB.
Modify The Docker-Compose Setup
Now we need to change the dev.yml and docker-compose.yml files. Specifically, we will change the postgres container to use our new docker-postgis image. We’ll also fix up some of the environment variables for the database configuration. Here is our revised dev.yml file:
version: '2'

volumes:
  postgres_data_dev: {}
  postgres_backup_dev: {}

services:
  postgres:
    build: ./compose/docker-postgis
    volumes:
      - postgres_data_dev:/var/lib/postgresql/data
      - postgres_backup_dev:/backups
    environment:
      - ALLOW_IP_RANGE=172.18.0.0/16

  django:
    build:
      context: .
      dockerfile: ./compose/django/Dockerfile-dev
    command: /start-dev.sh
    depends_on:
      - postgres
    environment:
      - POSTGRES_USER=docker
      - POSTGRES_PASSWORD=docker
      - POSTGRES_DB=gis
      - USE_DOCKER=yes
    volumes:
      - .:/app
    ports:
      - "8000:8000"
    links:
      - postgres
Comparing to the original file, we have:
- changed the
buildfor the postgres container to use the docker-postgis dockerfile, - removed user name and added the allowed IP range in the
environmentblock for the postgres container section, - changed the values of
POSTGRES_USERandPOSTGRES_PASSWORDand added aPOSTGRES_DBvalue that matches the default database name and credentials provided by our new PostGIS container.
You’ll note that we aren’t worrying too much about database security here. That’s because the postgres container will only accept connections from the local docker network. This will allow us to add new containers that will access the database in the same way as the django container, but unless we specifically enable it, outside users won’t be able to access the database container directly.
We will make some similar changes to the docker-compose.yml file, but we’ll put that off until we start dealing with encryption and other production issues.
Change Our Django Settings
We’ll be editing the django settings a lot as we add new apps, but before we can use the spatial database we need to add a couple of lines to the file config/settings/common.py in two specific spots. First, add the line "django.contrib.gis", in the DJANGO_APPS section as shown:
DJANGO_APPS = (
    # Default Django apps:
    'django.contrib.auth',
    'django.contrib.contenttypes',
    'django.contrib.sessions',
    'django.contrib.sites',
    'django.contrib.messages',
    'django.contrib.staticfiles',
    'django.contrib.gis',

    # Useful template tags:
    # 'django.contrib.humanize',

    # Admin
    'django.contrib.admin',
)
Also, add the line specifying the postgis database engine as follows;
# DATABASE CONFIGURATION
# ------------------------------------------------------------------------------
# See: https://docs.djangoproject.com/en/dev/ref/settings/#databases
DATABASES = {
    'default': env.db('DATABASE_URL', default='postgres:///cookie_cutter_demo'),
}
DATABASES['default']['ATOMIC_REQUESTS'] = True
# specify Postgis backend
DATABASES['default']['ENGINE'] = 'django.contrib.gis.db.backends.postgis'
Now we should be able to fire up our development server and see if it is working with PostGIS.
Build Our Spatially Enabled Containers
Back in the console, we will repeat the docker process to build and run the containers.
$ docker-compose -f dev.yml build
$ docker-compose -f dev.yml up -d
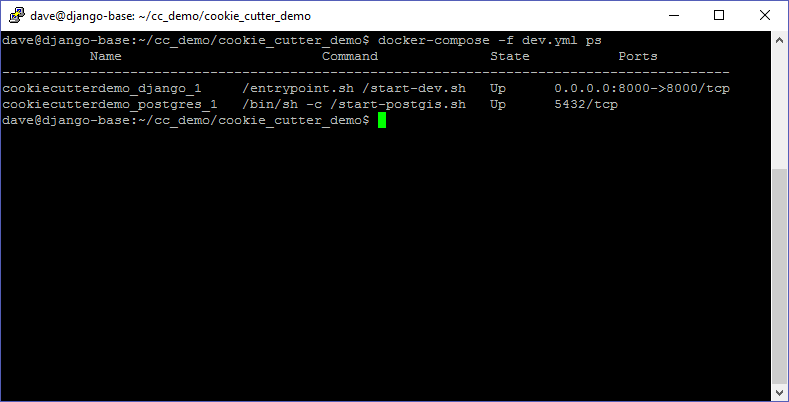
$ docker-compose -f dev.yml ps
After all the pulling and unpacking is done, the ps command should once again show our two containers running.
Since we are using a new database we will also have to migrate the django models and create a superuser account.
docker-compose -f dev.yml run django python manage.py makemigrations
docker-compose -f dev.yml run django python manage.py migrate
docker-compose -f dev.yml run django python manage.py createsuperuser
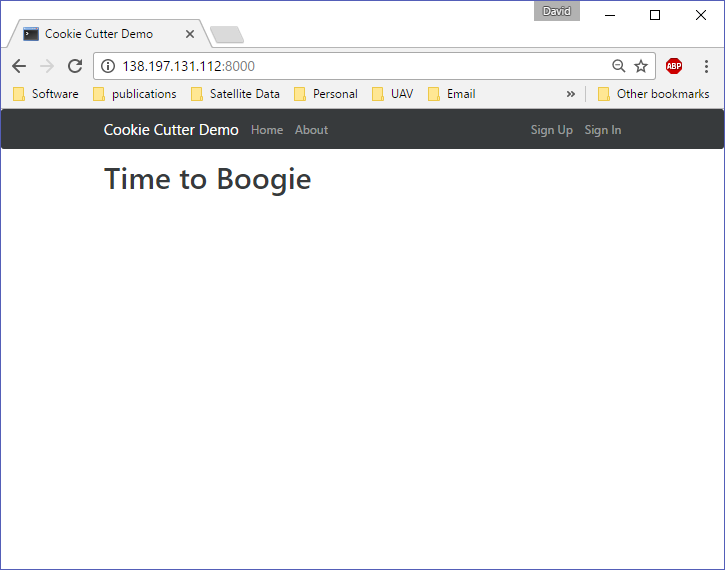
Now we should be able to access our django website at port 8000.
And run the tests.
$ docker-compose -f dev.yml run django py.test
As you can see, our changes from before have been preserved even though we rebuilt the django container. It still isn’t doing much though. Let’s add some spatial data just to be sure everything is working. But first….
Again With The Source Code Control
We’ll remove the postgres branch from the compose directory and save our changes.
$ git rm -r compose/postgres
$ git commit -am "Postgis working, not tested"
Add A GeoDjango App
First we will start an app the django way. Of course we could also just create a directory and some python files but sticking with the approved method seems right for now. One complication of doing it this way is that the django container is running as root so the ownership of the directory and files that are created by the startapp command need to be changed so that we can edit them as our non-root user.
docker-compose -f dev.yml run django python manage.py startapp geodata
sudo chown -R dave:dave geodata
We should now see a geodata directory in our cookie-cutter-demo folder. Note that when I am using WinSCP I have to refresh the view in order to see new files created from the PuTTY console. Here is what that folder should look like:
geodata
├── admin.py
├── apps.py
├── __init__.py
├── migrations
│   └── __init__.py
├── models.py
├── tests.py
└── views.py

1 directory, 7 files
We need to add our app to the django settings. Editing the config/settings/common.py file again, add the geodata, line shown:
# Apps specific for this project go here.
LOCAL_APPS = (
    # custom users app
    'cookie_cutter_demo.users.apps.UsersConfig',
    # Your stuff: custom apps go here
    'geodata',
)
First Write A test
You could skip this part, but you shouldn’t. Following best practices is a good habit that requires discipline. If we are to obey the testing goat then we need to write a test. Create a file called geodata/test_models.py and insert the following code:
from test_plus.test import TestCase
from .models import Location
from django.contrib.gis.geos import Point

# Tests for geodata classes

class LocationModelTest(TestCase):

    def test_saving_and_retrieving_locations(self):
        first_point = Location()
        first_point.name = "The first point"
        first_point.mpoint = Point(-112.54, 68.9)
        first_point.save()

        second_point = Location()
        second_point.name = "The second point"
        second_point.mpoint = Point(149.36, -10.52)
        second_point.save()

        saved_points = Location.objects.all()
        self.assertEqual(saved_points.count(), 2)

        first_saved_point = saved_points[0]
        self.assertEqual(first_saved_point.name, "The first point" )
        self.assertEqual(first_saved_point.mpoint.x, -112.54)
        self.assertEqual(first_saved_point.mpoint.y, 68.9)

        second_saved_point = saved_points[1]
        self.assertEqual(second_saved_point.name, "The second point" )
        self.assertEqual(second_saved_point.mpoint.x, 149.36)
        self.assertEqual(second_saved_point.mpoint.y, -10.52)
This will test point creation, saving, and retrieval from the database. We’ll make a data model later that has two fields, a name and a mpoint. First we need to get the test to fail. Now we can run the test from the console:
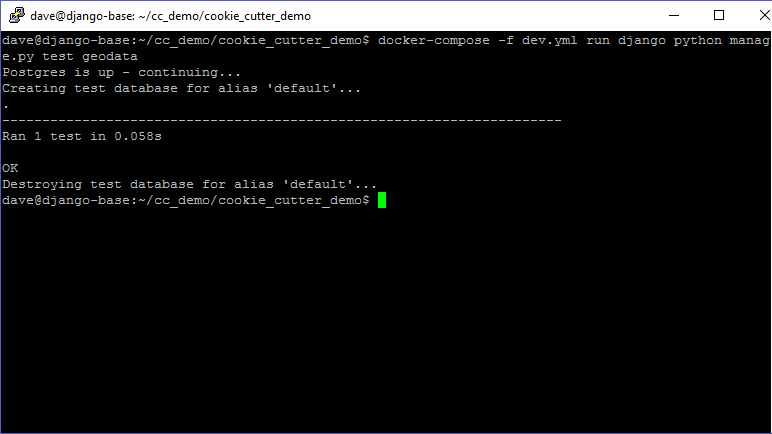
$ docker-compose -f dev.yml run django python manage.py test geodata
This should give a result as below:
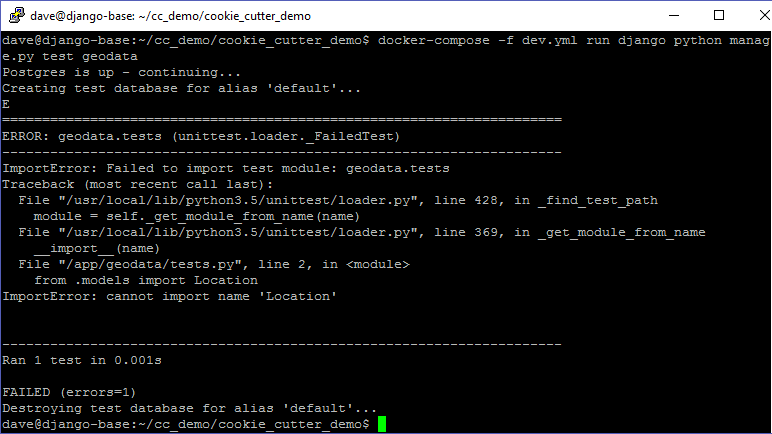
Awesome, now we can write some code.
A note about test code: When we run the django startapp command, a file called
tests.pyis created but we are not using it. Instead we created a file calledtest_models.py. The reason for this is that the pytest library looks for files namedtest_*.pywhile djangos test runner looks for files that matchtest*.py. This way we can test using the command shown above, or with the commanddocker-compose -f dev.yml run django py.test
Create A Location Model
Let’s edit the geodata/models.py file and define the Location model.
# -*- coding: utf-8 -*-
from __future__ import unicode_literals, absolute_import
from django.utils.encoding import python_2_unicode_compatible
from django.contrib.gis.db import models

# A simple point location with a name
@python_2_unicode_compatible
class Location(models.Model):
    name = models.CharField(max_length=50, default = 'Unknown location')
    mpoint = models.PointField()

    def __str__(self):
        return self.name
All that importing from the future and python 2 compatibility stuff is there to ensure our code works with as many different python and django versions as possible (so it’s optional?), but the key thing to note is that we are importing our models definition from django.contrib.gis.db which is what allows us to define a PointField.
Since we have made a change to a model, we have to migrate the database before we can test. This pattern should be getting familiar. We also need to collect the static assets that GeoDjango requires.
$ docker-compose -f dev.yml run django python manage.py makemigrations
$ docker-compose -f dev.yml run django python manage.py migrate
$ docker-compose -f dev.yml run django python manage.py collectstatic
If we run the test now we get:
Excellent. We can now use the admin for CRUD with an OpenLayers widget. Open the geodata/admin.py file and add the following code:
from django.contrib.gis import admin

# Register your models here.

from .models import Location

admin.site.register(Location, admin.GeoModelAdmin)
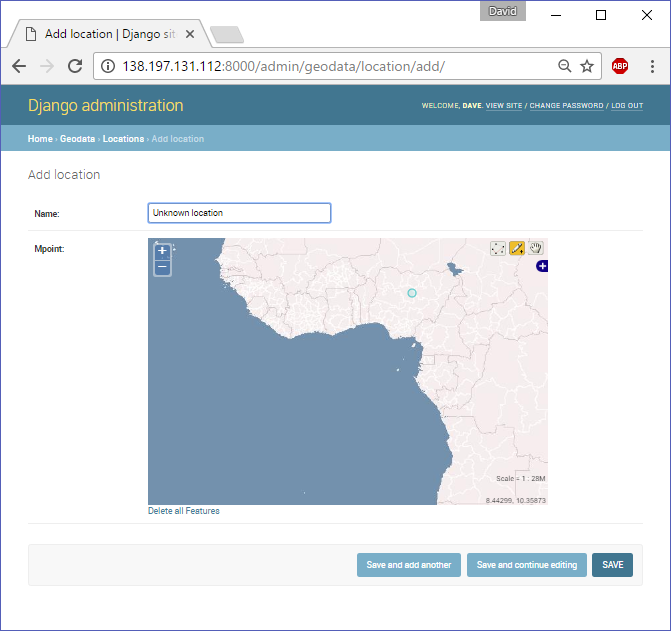
Now when we point our browser to the admin site, we should see our geodata-Location class.

And when we click the Add link for a Location, we get a very nice slippy map to click on.
Clean Up
That should do it for this post. The next steps will be:
- configure and run the production server, which uses an Nginx container and serves secure web pages with LetsEncrypt!
- Then we can get into the meat of developing some django applications
Before we finish, we will stop and remove the docker containers.
$ docker-compose -f dev.yml down